The recommended version of Wayne Warthen’s RomWBW for SC131 can be found here.
The very latest version, source code and documentation for RomWBW can be found here.
Getting started with RomWBW
The following describes the use of RomWBW v3.0, 2020-03-27
The standard distribution of RomWBW for SC131 assumes a terminal is connected to serial port A. The default serial port settings are: 115200 baud, 8 data, 1 stop, no parity, hardware flow control.
An SD card is optional.
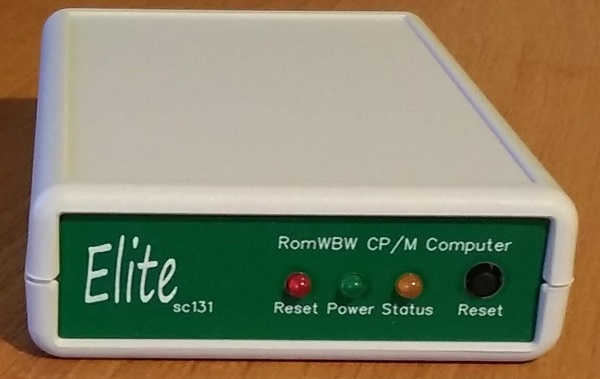
At power-up RomWBW initialises and displays self-test result on the Status LED.
Status LED
Following a reset, the Status LED should light for about half a second, then blink off for a fraction of a second, then light again. This indicates the self-test has passed.
Once an option is selected from the RomWBW startup menu the Status LED turns off, but lights during access to the SD card.
System information
When RomWBW starts it will display something like this on the terminal:

The first line shows the HBIOS version.
RomWBW HBIOS v3.0, 2020-03-27
Following this is the configuration name “SC131” and the CPU details. This should say “Z8S180-K” or “Z8S180-N”, followed by the speed (18.432MHz) and the Z180 register base address (0xC0).
SC131 Z8S180-N @ 18.432MHz IO=0xC0
The memory and I/O wait states are shown, each with a value of 0 to 3. Zero wait states is the fastest. The interrupt mode is also shown, followed by memory size.
0 MEM W/S, 2 I/O W/S, INT MODE 2
512KB ROM, 512KB RAM
The next block is all the devices detected.
ASCI0: IO=0xC0 ASCI W/BRG MODE=115200,8,N,1
ASCI1: IO=0xC1 ASCI W/BRG MODE=115200,8,N,1
MD: UNITS=2 ROMDISK=384KB RAMDISK=384KB
SD: MODE=SC OPR=0x0C CNTR=0xCA TRDR=0xCB DEVICES=1
SD0: SDHC NAME=SU08G BLOCKS=0x00ECE000 SIZE=7580MB
ASCI0/1 are the Z180’s serial ports.
MD is the memory devices. There should be 2 units: ROMDISK and RAMDISK.
SD is the SD card connect to SC131’s SPI port.
This is followed by details of the character and disk devices.
Unit     Device   Type        Capacity/Mode
-------  -------  ----------  -----------------
Char 0   ASCI0:   RS-232      115200,8,N,1
Char 1   ASCI1:   RS-232      115200,8,N,1
Disk 0   MD1:     RAM Disk    384KB,LBA
Disk 1   MD0:     ROM Disk    384KB,LBA
Disk 2   SD0:     SD Card     7580MB,LBA
Finally, the boot options menu is displayed.
SC131 Boot Loader

ROM: (M)onitor (C)P/M (Z)-System (F)orth (B)ASIC (T)-BASIC (P)LAY (U)SER ROM
Disk: (0)MD1 (1)MD0 (2)SD0

Boot Selection?
Preparing an SD card
An SD card provides a number of logical drives. Before using a drive it must be prepared with “CLRDIR” from CP/M. With recent releases of RomWBW you may need to use FDISK80 first.
When CP/M starts it will list the available drives. In the example below the SD card has8 drives (C: to J:).
Loading CP/M 80 v2.2…

CBIOS v3.0 [WBW]

Configuring Drives…
A:=MD1:0
B:=MD0:0
C:=SD0:0
D:=SD0:1
E:=SD0:2
F:=SD0:3
G:=SD0:4
H:=SD0:5
I:=SD0:6
J:=SD0:7

1932 Disk Buffer Bytes Free

CP/M-80 v2.2, 54.0K TPA

B>
Start CP/M and enter the command “CLRDIR D:”. To confirm you really do want to do this, press the “Y” key. Note, it has to be an upper case “Y”. The terminal should show something like this:
CLRDIR V-0.4 (06-Aug-2012) by Max Scane

Warning - this utility will overwite the directory sectors of Drive: D:
Type Y to proceed any key other key to exit. Y
Directory cleared.
A simple way to test a drive is working properly is to do a copy with verify. For example:
B>pip d:=b:*.*[v]

COPYING -
ASM.COM
CLRDIR.COM
COMPARE.COM
COPY.CFG
COPY.COM
DDT.COM
DDTZ.COM
...
